4. Start Seed With Presoak
In this section we will walk through our tested method of starting a plant from seed.
- There are 2 parts we use to start a seed; in Part 1 we will get the seed to start its roots in a small container, then a couple of days late in Part 2 we will move the seed into a small nursery bag with soil so that it can continue growing.
- You can find the full video at the bottom.
Start Seed Part 1 – Steps:
- Tear off a small piece of paper towel that will fit inside your container and fold it in half.
- Place the cannabis seed into the center of your paper tower and fold it a couple of times around the seed.
- Moisten the paper towel/seed with some water then place it inside the small container.
- Cover the container with the lid (leave lid unsealed so a little air can still get in).
- Wrap the small hand towel around the container to keep the seed dark.
- Place your wrapped seed somewhere that gets a little heat. You can use a heating pad if you have one, the top of a fridge, a laptop, or anywhere that gets a little warm. The heat will help the seed pop faster.
- Check back a couple times a day, keep the paper tower moist, make sure not to soak too much as that can kill the seed.
- You should see some roots starting to form in 1-3 days. At that point you can move on to Part 2 below.
Start Seed Part 1 – Parts and Tools:
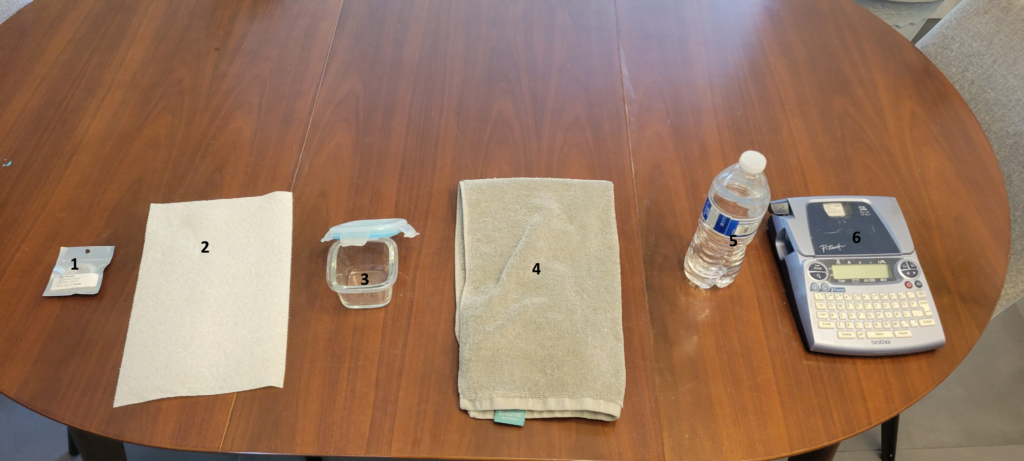
- Feminized cannabis seed – Make sure you have a feminized seed or you will have unexpected results farther in this tutorial.
- Paper towel – A small piece of paper towel will be wrapped around our seed to keep it most.
- Small container with lid – Any small container with lid should work fine, your seed will go inside here and the lid will help to create humidity for the seed.
- Small hand towel – This will be wrapped around our small container to keep it dark, which seeds like.
- Bottled water (optional) – Will be used to keep the paper towel/seed moist. You can use tap water for this but this is just an extra precaution since not all tap water is created equal.
- Label Maker (optional) – Helps to create labels that can be used through the whole process of tracking a plant. I will call this one “Blue Dream 1”, in case I take blue dream clones in the future and need to write notes. Click here for an example.
Start Seed Part 2 – Steps:
- Check the seed in your small container with lid and make sure your are seeing a small root pop out. Its best to catch this root early so that it doesn’t get too big before the transfer as that increases the chance of damage.
- Prepare your 60/40 cocoa perlite mix then use the spoon to fill the bottom half of the small nursery bag with it. YouTube: Mix Cocoa and Perlite (60/40 Cocoa/Perlite Mix)
- Fill the top half of the nursery bag with the presoaked organic soil(mix up to 20% perlite for extra drainage if desired). Leave 1/4 inch or so at the top to help with watering later. Push it down to be a little tight.
- Make a hole about 1/4″ deep with a pen in the center of the organic soul and gently place your rooting seed in the hole. Gently push the soil over the seed and cover the hole.
- Take some of the bottled water lightly water the top of the organic soil and seed.
- Place The nursery bag in a 16oz plastic cup to help it stand and retain a little moisture.
- Place your Ziploc bag around the nursery bag and plastic cup to create a higher humidity and to weaken the grow light rays. Close the bag on the sides of the plastic cup.
- Transfer over the label from your seed starting container to the plastic cup with nursery bag.
- Place everything into your veg tent with 18 hours of light. A little light leaking is ok here but make sure the plant gets at least 18 hours of light or it can start to flower. You don’t need a lot of light strength to get seed started and too much can be harmful. Set your veg light to around 50% and have at least 2 feet away from the plant.
- Now keep your soil lightly moist(you can use the rest of your water bottle here then switch to tap water) and watch for the plant to pop out, should take a couple of days to see the first little plant pop. Do not over water, this can drown the seed but having it in a nursery bag helps greatly to reduce that risk. Add a little water about once a day or so, the Ziploc bag should prevent the plant from drying out too fast.
- Once the plant pops you can continue to the next part of this tutorial.
Start Seed Part 2 – Parts and Tools:
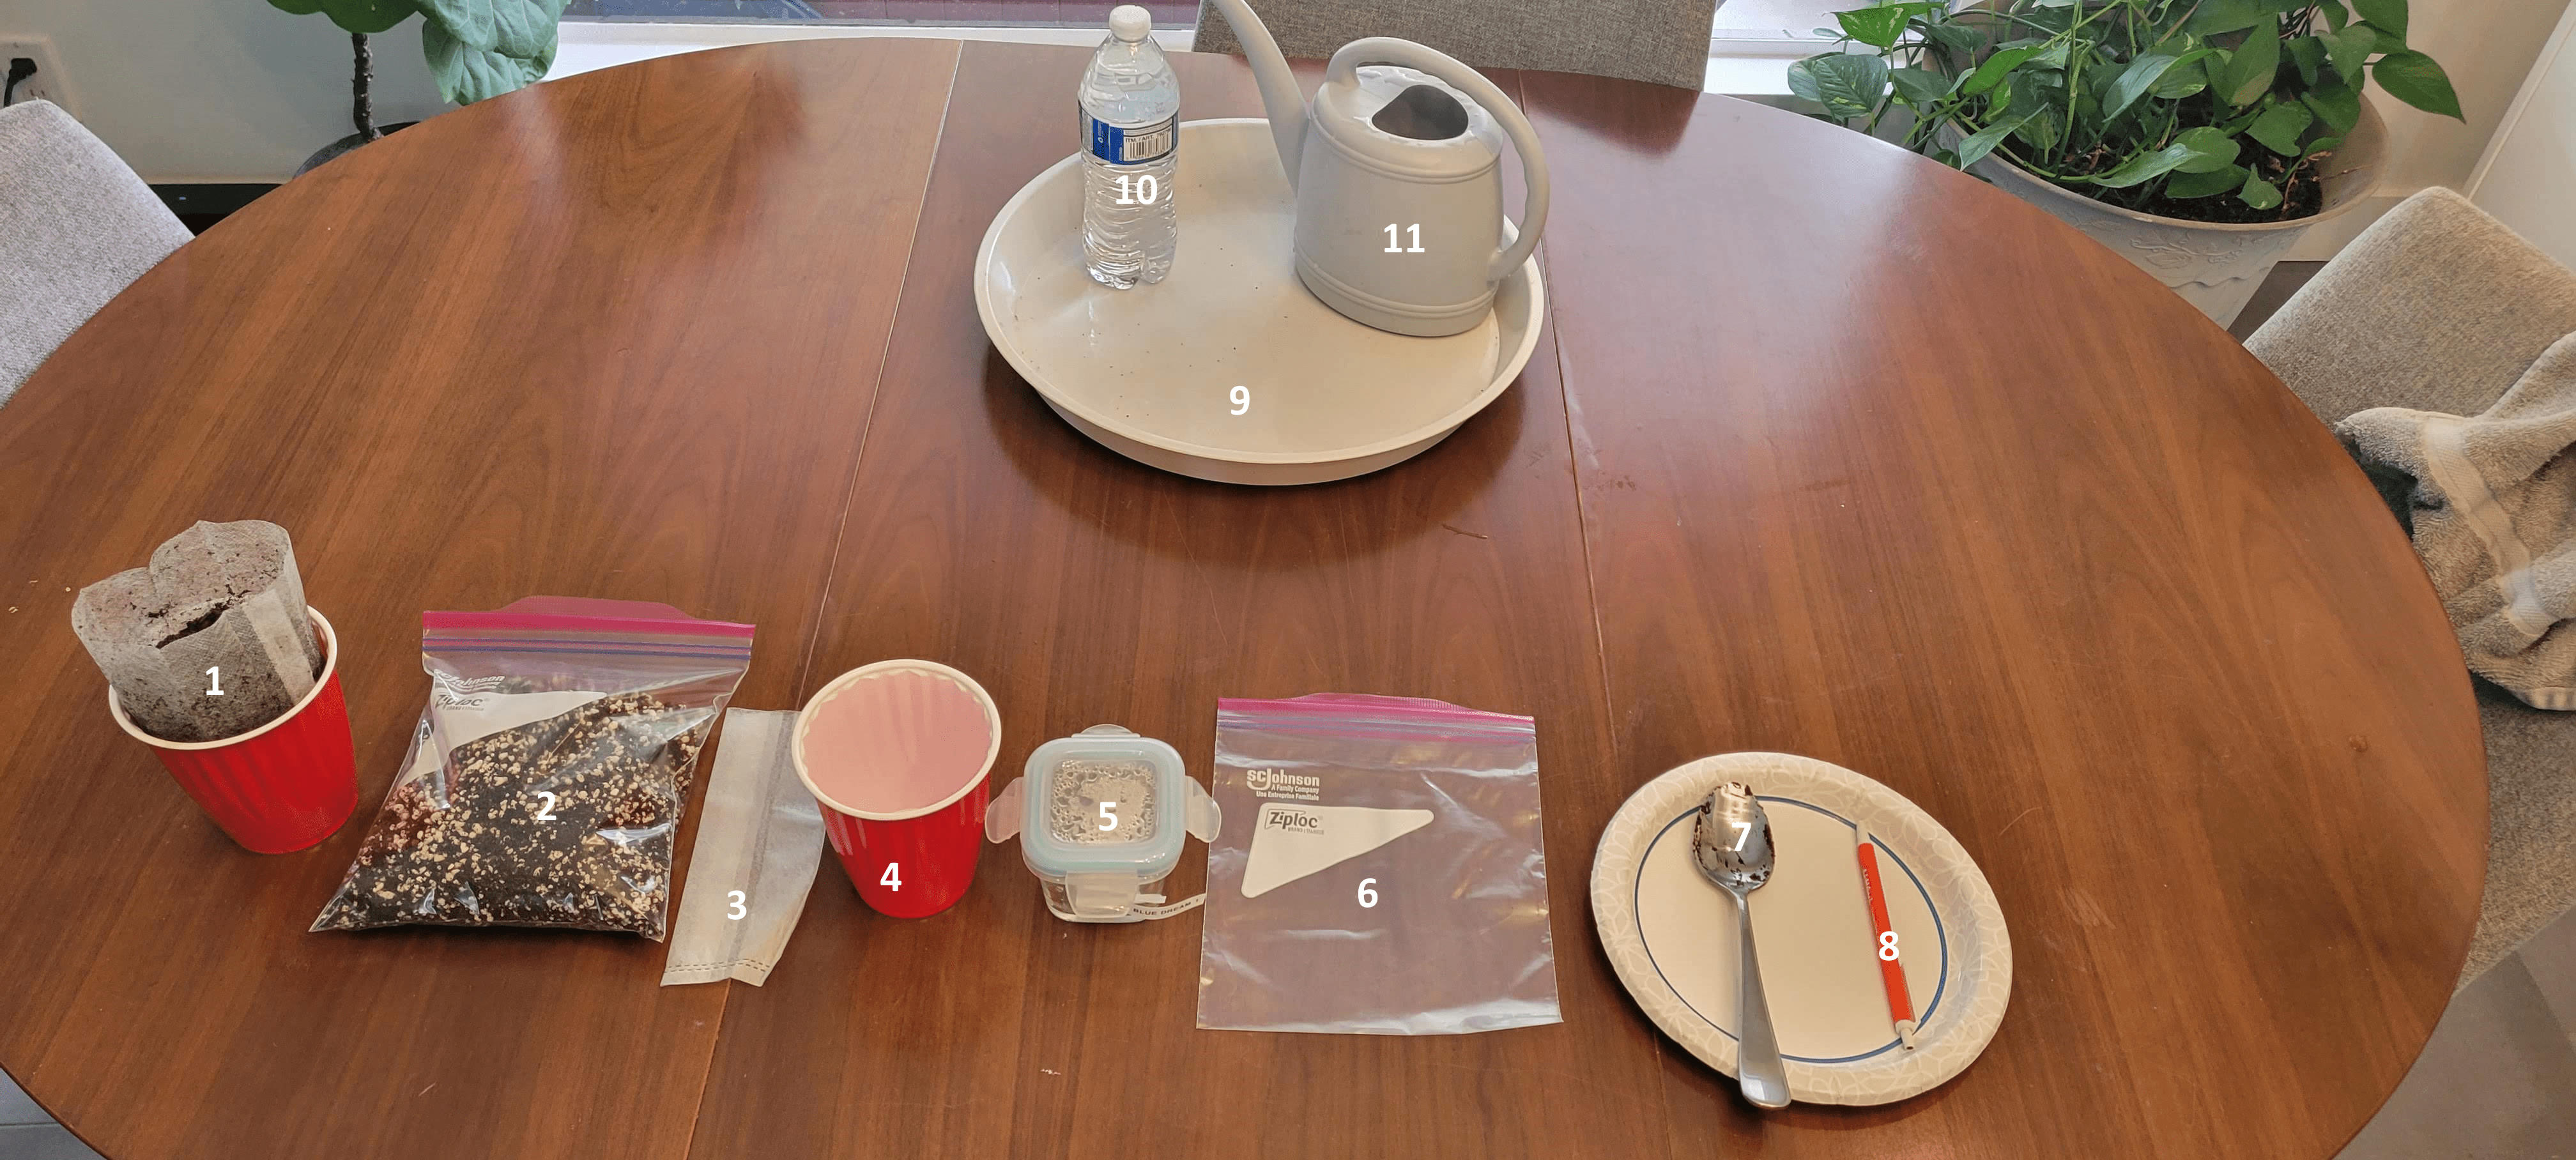
- Presoaked Organic soil – Click here for an example. You can mix in up to 20% of perlite for extra drainage. Soak this separately so it is ready for your seed.
- 60/40 cocoa/perlite mix – You need to mix your cocoa and perlite. I would mix at least enough for a 3g grow bag and a small nursery bag. YouTube: Mix Cocoa and Perlite (60/40 Cocoa/Perlite Mix)
- Small Nursery Bag – Click here for an example.
- 16oz plastic cup – Click here for an example.
- Seed with small root – Wait till you see a small root popping out of your seed. The sooner you catch it the better as the chances of damaging it increase if it gets too big.
- Small Ziploc bag – A Ziploc bag big enough to cover the nursery bag. Click here for an example.
- Spoon – Any household spoon you like will do.
- Pen – Any household pen you like will do.
- Plant saucer – This will help keep things cleaner as your prepare everything for your seed.
- Bottled water – This is an extra precaution when watering your small seed.
- Small watering can – Fill this with tap water.